Tool Belts

Sunday, July 24, 2011

New Windows & Reframing Existing Walls

This is the existing side door and old kitchen windows. Erik and I are planning on making the old kitchen into an office at some point. We are replacing the existing windows with similar high windows so we can furnish against that wall. We took out the old kitchen door and filled in the opening. As we opened up the interior to take out the windows and reframe for the new rough opening, we realized that there wasn't much framing to begin with. It appeared that the studs that were holding up the sill for the window were either rotten or not existent, it was a wonder that wall was even upright. I believe either the kitchen counters or the insulation had structural integrity at this point of the wall.

This wall made me sad. Thinking ahead to the other 4 exterior walls we are going to encounter before we are done, it just got me wondering what other surprises were lurking beneath the surface. I am lucky that Erik has seen just about everything at this point and we are motivated to keep moving ahead.

Also, as a sidenote, since the exterior of the house is pretty much open at this point and it was just a matter of time before the word was out to the flying squirrel crew. We heard the terrifying sounds of them moving back in! "Google" image flying squirrel and you'll see what made Erik panic and stay home on July 4th weekend to button up the exterior so that they couldn't get back in.

Framed & Roofing

We've been busy with the framing of the mudroom/entry addition. Trying to tie in the existing roofs to the new addition was tricky. We also needed to remedy the flat roof out back. There was a few sleepless nights where the roof over the NEW kitchen was open to the elements and we were concerned about thunderstorms ruining all our hard work. But someone above (my dad, perhaps) was looking out for us and the doppler radar showed the storm headed our way, splitting as it reached Cape Elizabeth and then re-forming after it passed. It was amazing. Amazing that we were saved from further destruction.

Above photo shows the wall and roof of the new kitchen being exposed to the elements, as the roof is being framed up over the new mudroom/entry.
New elevation for the mudroom entry. So exciting to see the progress.

Again, Carter brings his generosity to help Erik roof the new addition. It is amazing to have such a great friend, to take a day away from his family to help us out. We cannot thank him enough or his lovely wife Sarah. It makes the work go so much faster and easier to have the extra help.
The beautiful, blue bird day helped too. We have lucked out with the weather so far....
The Typar goes up before the grace ice & water shield, when water rolls off the roof it doesn't find it's way beneath the building wrap.
More updates to come- so stay tuned....


Got Grass


It's official...we've got grass growing in our front yard! Last year at this time, we had a pile of wood growing in our dust bowl of a front yard. Since we took down the oak trees that were preventing anything but moss from growing on the front yard, everything including the moss dried up. You can barely tell, but there is a septic under that fresh green grass.

Just in case you may have forgotten what last year looked like.

Thursday, May 26, 2011

Framed


Carter made an appearance, enjoying some G& Ts on the loveliest days we'd had in a week.

And we had the addition framed up. Our plan for the weekend, is to get this side of the existing house stripped and put in the new windows. A big challenge for us, but a good goal for the long weekend. I'll need to have it stripped in order to get the shingles to the dump on Saturday, since we don't have a dumpster this time, which is kind of a pain in the can.

Foundation

Well, soon after the guys were finished excavating the hole for the addition... (Oh, did I mention we are adding a mudroom entry between the original house and the kitchen. This will house a mudroom, entry, a coat closet, a powder room, and a little linen closet. ) the guys ran off (they had to catch a ferry to their next job!), leaving a giant hole. Fred Prescott, the foundation guy, came in and built the forms for the footings.
And his son took it from here, this was to be his last foundation he poured with his dad before he was moving to Massachusetts to go to college.

Footings being poured.
Moving the wet concrete around doesn't look easy.
He smooths it out with a trowel.
The next day, in between torrential rain, they put up the wall forms.
Bartlett is thrilled to have a new dirty place to lay.

Wednesday, May 18, 2011

Septic 101- part 2

Part 2; Septic install.
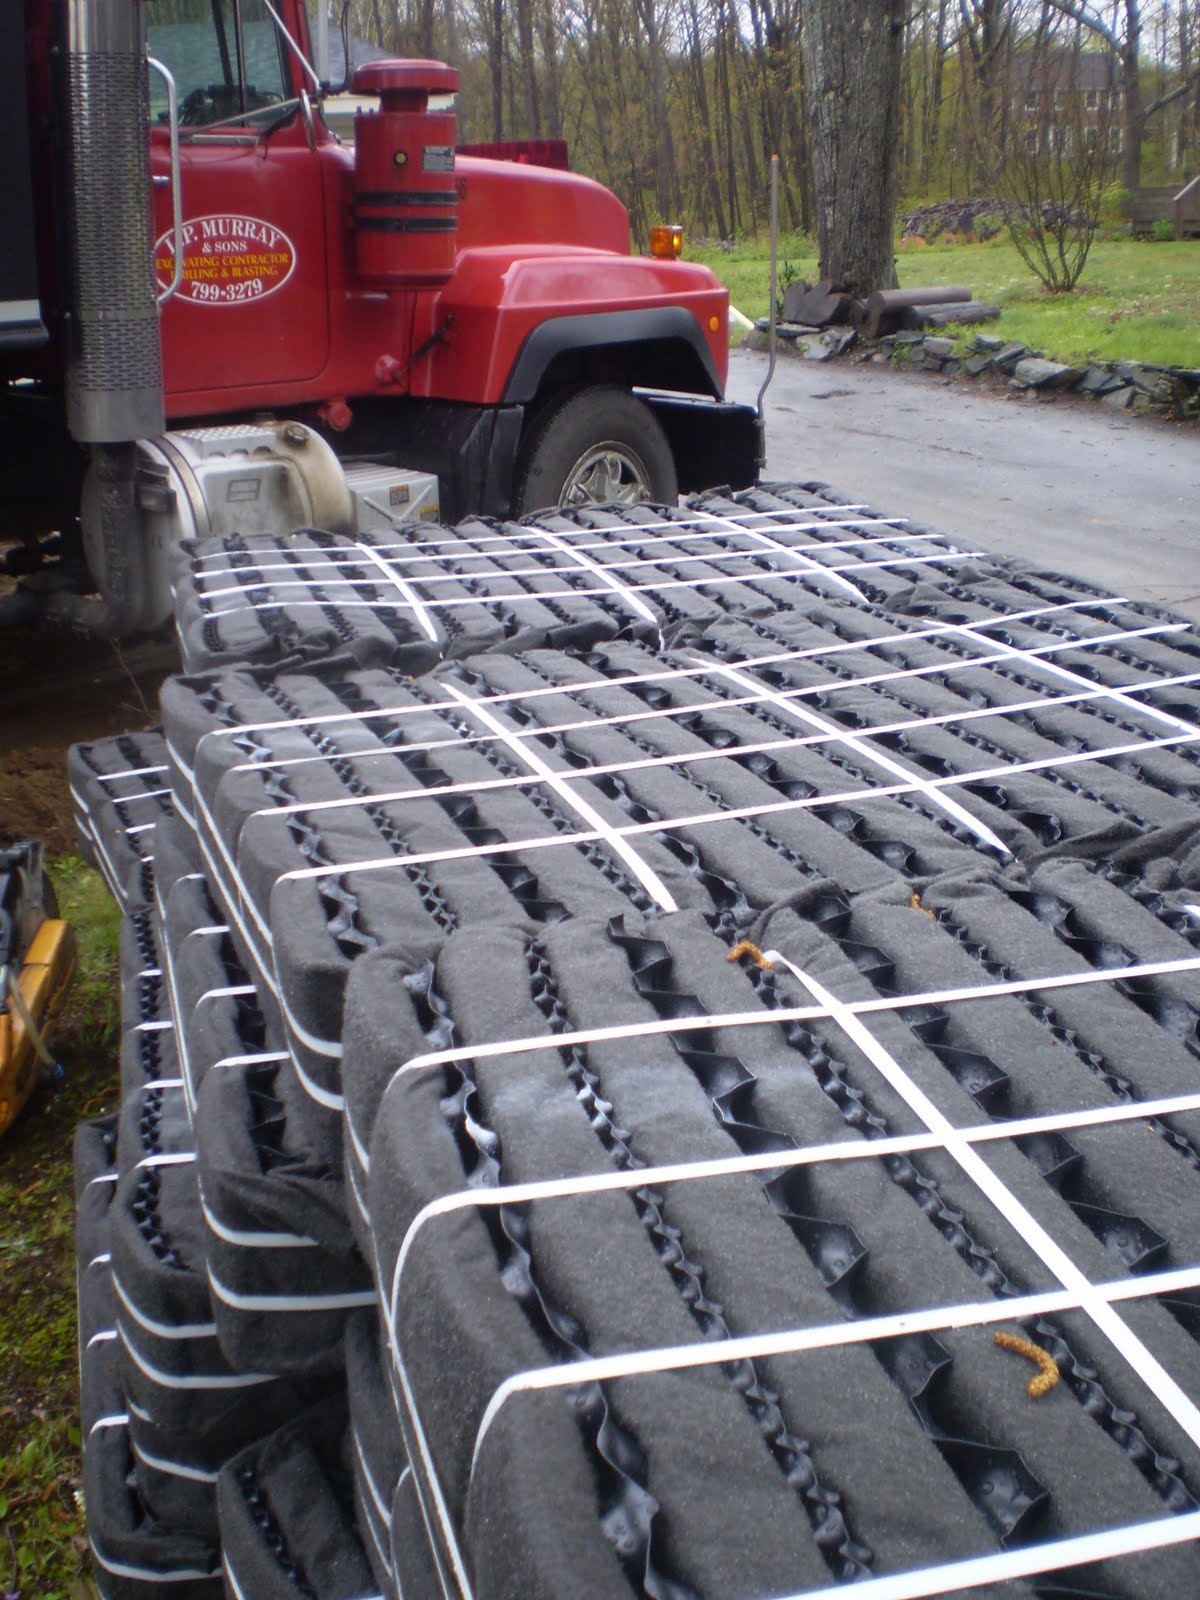
As you can see from the photo above- this is the leaching bed. What happens is this- PVC piping is hooked into the concrete pre-cast tank and run on top of the black beds which are made out of a geotech fabric and some plastic thing that looks like an egg crate. Inside the tank bacteria eats away at the waste and pees out a cleanish waste and that gray water is carried through the pipes on the leaching bed and is distributed into the ground, which again gets cleaned through the leaching bed system.
Chappy is putting the bed to sleep with a sheet of fabric over the top of the leaching beds.
Then he buries it with another foot of sand.
The excavation for the addition. Ba BYE brick steps. Oh and I forgot to tell you, when they wrecked the front steps to put the connection into the tank- it was a slab of concrete that was reinforced with what looked like an old spring bed frame. The kind that my grandma had on the porch and was super squeaky.
That guy with the shovel just realized there was a huge tree stump/root ball and he is trying to uncover the edges of it....hee hee hee! And that other guy is Chappy the excavator operator and he is not laughing.


The front now has a layer of loam on top of where the septic was installed. It will be great if grass grows.
Large tree stump/root ball. This one came up easy, about 2 hours? The driveway got a bit smaller as the pressure from the machine cracked the driveway further back, yikes.

There it is. In it's glory.
That is the 2nd root. It wasn't as easy, and there were some not so nice words expressed about it.


Monday, May 16, 2011

Septic 101

It's here! Our septic is being installed, today. It was a bit of a surprise this morning when the trucks showed up. I wasn't expecting them. But there they were at 7am. It'll be a mess out front, for a bit but we'll finally have a septic and we won't be wondering how much longer we could go without it.
These loops are what the liquid waste is run through- or the leaching field.
Looking for the existing cesspool. Surprise! There isn't one or at least there isn't one any longer. It may have collapsed. At least the pond will finally have a chance to clean up.
Close call with the crane and the electrical wires, this guy wasn't even sweating.

The concrete blocks are the bottom and top of the tank.
Lifting into the hole. Just made it under the wire, literally.
Oops, the tank is in the right spot, but needs to be 4" further down and then we won't need a pump. They pull it up and dig a bit more out and set it in the hole again.
Lid on- over a water stop sealant. They are ready to lay the leaching field out. Waiting for a layer of sand, silt, dust to be unloaded in order to lay the leaching bed out.