Tool Belts

Wednesday, May 18, 2011

Septic 101- part 2

Part 2; Septic install.
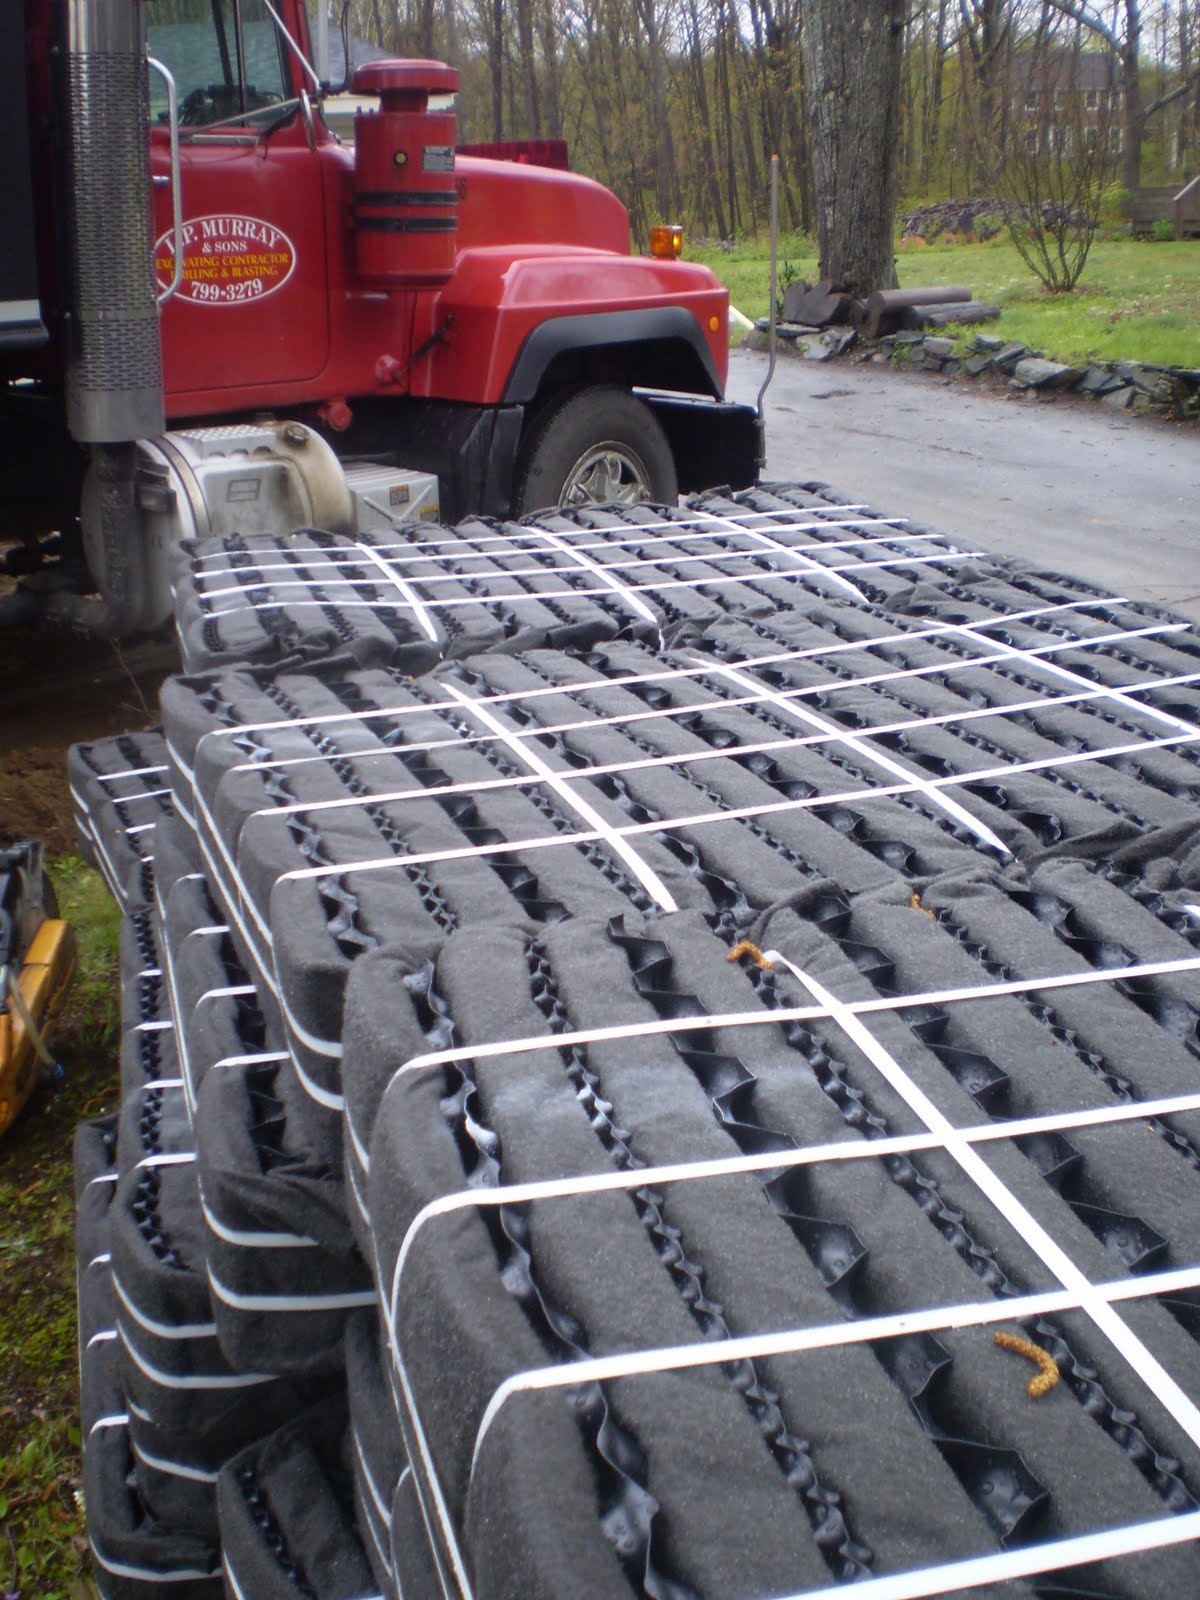
As you can see from the photo above- this is the leaching bed. What happens is this- PVC piping is hooked into the concrete pre-cast tank and run on top of the black beds which are made out of a geotech fabric and some plastic thing that looks like an egg crate. Inside the tank bacteria eats away at the waste and pees out a cleanish waste and that gray water is carried through the pipes on the leaching bed and is distributed into the ground, which again gets cleaned through the leaching bed system.
Chappy is putting the bed to sleep with a sheet of fabric over the top of the leaching beds.
Then he buries it with another foot of sand.
The excavation for the addition. Ba BYE brick steps. Oh and I forgot to tell you, when they wrecked the front steps to put the connection into the tank- it was a slab of concrete that was reinforced with what looked like an old spring bed frame. The kind that my grandma had on the porch and was super squeaky.
That guy with the shovel just realized there was a huge tree stump/root ball and he is trying to uncover the edges of it....hee hee hee! And that other guy is Chappy the excavator operator and he is not laughing.


The front now has a layer of loam on top of where the septic was installed. It will be great if grass grows.
Large tree stump/root ball. This one came up easy, about 2 hours? The driveway got a bit smaller as the pressure from the machine cracked the driveway further back, yikes.

There it is. In it's glory.
That is the 2nd root. It wasn't as easy, and there were some not so nice words expressed about it.


Monday, May 16, 2011

Septic 101

It's here! Our septic is being installed, today. It was a bit of a surprise this morning when the trucks showed up. I wasn't expecting them. But there they were at 7am. It'll be a mess out front, for a bit but we'll finally have a septic and we won't be wondering how much longer we could go without it.
These loops are what the liquid waste is run through- or the leaching field.
Looking for the existing cesspool. Surprise! There isn't one or at least there isn't one any longer. It may have collapsed. At least the pond will finally have a chance to clean up.
Close call with the crane and the electrical wires, this guy wasn't even sweating.

The concrete blocks are the bottom and top of the tank.
Lifting into the hole. Just made it under the wire, literally.
Oops, the tank is in the right spot, but needs to be 4" further down and then we won't need a pump. They pull it up and dig a bit more out and set it in the hole again.
Lid on- over a water stop sealant. They are ready to lay the leaching field out. Waiting for a layer of sand, silt, dust to be unloaded in order to lay the leaching bed out.

Tuesday, April 26, 2011

Kitchen- Before & After


Amazing what a year can bring you. Although it's been a long hard year. It was worth the work. Many tears (me crying hanging drywall) and sweat, (Erik just about every day) literally working himself to exhaustion. We do have the rest of the house to finish- but it feels so good to have one space that is done.
The photo above is of the large fireplace during our walk through. This great room was a surprise to us, it is not apparent from the exterior of the house, that this room existed. It did have some issues, some of you may remember the tree removal. That helped immensely. Now we have a slider with a transom over the top that brings in so much light during the day and gives us a great view of the pond out back. Removing the 8'-0" hearth has helped in being able to furnish the entire space. Of course relocating the kitchen into the room- affords us a place for us both to be- while Erik whips us up a gourmet meal I can sit on the couch and watch,American Loggers. Or did I get that reversed. It is, NOW, truly a family room.
This photo is dark- but really depicts what this room was like. This is looking back toward the driveway- there was a door into the great room right off the driveway and next to it another door into the garage and large fixed window.

This was taken during our gut of the space- where the ladder is leaning up against the wall was what was meant to be ( I think) a powder room- but was never realized. It just became another dark hall way with a large closet. We tore it out- opening it up to the existing house- with the intention of building a mudroom entry at a later date that would open up to the new open space. The door in the background opens up into the garage- for some time our dumpster (s) were in there and that is where a new smaller mudroom, giving a buffer from the garage, instead of just opening up into the great room.

AFTER
We kept the wood box- put new pine paneling inside. We drywalled the entire room- leaving the existing beams and natural posts.

New slider with transom above and replaced the door to the deck with a window. Much brighter.

Sliding barn door, Erik made the door from salvaged barn board and it is on wood rails that run on a metal track. This closes off the mudroom into the garage- if we want another layer from the garage in the winter. It is reminiscent of our trip to Austria- where they utilized many old materials. It helps tie in the old beams to the space as well. The mudroom has changed color since this photo was taken- stay tuned...
Ta DA!! Kitchen revealed, new window over the sink. Island. Pendants. There are a few things in here that need tweaking, but we are officially using the refrigerator, sink, dishwasher and stove. Erik added barn board to the underside of the Island, which really makes this a one of a kind piece.
It's a bit Shaker and a bit Scandinavian. We tried to stay with the classic lines with the cabinets, keeping the old details of the beams, while we edged it up with some modern fixtures. Of course, this post comes after about 15 different paint colors. We finally agreed on Farrow & Ball's, old white. It is a subtle color that is bright during the day and gives a warm cozy feeling at night.
We are planning on adding some more barn board to mimic the beam above the fireplace wall over the sink- but we ran out, so if you know any sources, do let me know. Preferably free. I don't mind dressing in black at night to get it either, if you know what I mean.


Hearth Repair- Before & After

March 11, 2010 (Before)

Last year about this time, we were ripping up the Hearth that extended into the room 8'-0". It was awkward. Kevin & Erik went ballistic on the brick work- tearing even into the inside of the fireplace. When we brought the wood flooring over the concrete slab- we had to lay thin sleepers over it, in order to maintain an even height over the slab. Well, the same was true when Erik went to lay the bricks back into the fireplace & hearth. Still wanting to maintain the elevation of the Heart Wood floor- we wanted the hearth to be flush to it. This meant that each brick had to be cut to realize the floor height. It was a chore- since the slab was poured rather uneven- each brick was a different height. Some turned out to be a 1/2" thick after being cut down. Not only was this a feat of skill, it was a race against time, with the rental of the brick saw only giving us a small window for all the cutting to take place, 5:30pm on Friday night until 5pm on Saturday. Not quite 24 hours.

The Hearth with the bricks laid out in a pattern- precutting. A bit of history- the bricks were originally salvaged from a building that was torn down at Portland Head Light. The story goes that the Capano kids (previous owners) cleaned the mortar off each brick. Let's see if they confirm that story.


Head to Toe covered in brick dust.
The finished result, Bartlett is enjoying the new flush hearth. She has turned into a dog that loves to sleep in front of the fireplace. Who knew?

Saturday, March 5, 2011

Everything & the Kitchen Sink

We have everything ready for the kitchen, including the kitchen sink. All the cabinets are here, lights & faucet...waiting and ready to install. We are hoping to get them in the kitchen once the flooring is installed. Fingers crossed it will be done this weekend!
boxes
Cannot picture what this is- it's a wall of cabinet boxes.
and more boxes.
That is the path through the dining room. It is about a foot wide. Wall to ceiling boxes of cabinets. Oh, and Yes that is a brick patterned linoleum flooring. It's throughout the entire original section of the house. I know, we are so lucky!

Team Heart Wood

Erik & Carter begin the installation of the flooring. Erik started laying out the flooring this week in preparation for Carter coming up to help. Since the room is a little bit out of square (6"to be exact!) he started in the center and is working his way out to each side. This is proving difficult- but the boys are making it happen and it looks beautiful.

Here they are putting in the last piece to the wall side- the board furthest to the right is the first piece down.
Carter cleaning up before laying the next piece down. Erik banging the line into place.
Team "East by NorthEast"! I don't think they planned their matching attire...

Tuesday, February 15, 2011

Heart Wood in the HAUZ!

Now that the heat is on, literally, we can finally get going on the room. We've got everything coming in, on it's way or in the storage somewhere. On Friday we had the electricians in to finalize some lighting and receptacles. We also got our flooring. Erik and I spent a romantic valentine's day laying out the flooring in the space to acclimate for the next 3 weeks. Then once it reaches within 2% of the moisture ratio as the plywood, then you can install it. The blue tape outlines where the island will be, and the cabinets on the other sides. So exciting.
This photo is taken from the existing side of the house looking into where the new kitchen will be. Again, the blue tape outlines where the cabinets will be.
Here is our flooring. On Friday, the old guy from Bingham Lumber came up and brought the flooring. Erik and the old guy loaded each piece into the kitchen one at a time. It is camp grade Heart Pine. Which is the hardest of the softwoods. It' is so hard, since it taken from the "heart" of the tree. Many of America's mills and factories were built with heart pine, since it was valued for it's characteristics of being rot and insect resistant. They say that it is more stable than oak? I am not sure about that fact- but it sure is pretty.


This image above & below is the butcher block top. Today, the guy from Bingham Lumber brought the top up. It was laying in the back of his SUV and we carried it in together. It was super heavy. When I finally looked at the piece, I was almost crying it is so beautiful. The guys at Bingham did such a great job, picking the right pieces to construct the butcher block. It is so pretty. It is made from reclaimed heart pine. Which means it was originally a beam in an old mill or barn and cut down to take off the worn exterior and has a tight grain pattern. The newer wood doesn't have this character, but it is still beautiful.